COCOON
COCOON
An exercise on traditional manufacturing processes
MAGNIGYING GLASS
An exercise on traditional manufacturing processes
MAGNIGYING GLASS
Tinkerer, Engineer, Designer
Espression
The manufacturing process: Milling - Woodworking - Sand Casting
ME 203: Design and Manufacturing


Exploring Traditional Manufacturing Techniques
I built Espression at the Stanford Product Realization Lab using a variety of traditional manufacturing processes, such as manual milling, woodworking, and sand casting. The leg of the coffee table is an elegant, geometrically complex piece that provided the a great manufacturing challenge as I delved into the world of sand casting for the first time.
Sand Casting (Pattern Making)
A 10 degree draft was added on all sides of the part in order to remove the pattern from the sand without damaging or weakening the edges.


The part is symmetrical about the xy plane and sectioned into two identical sub-parts that are sandwiched together with an MDF board to create a fixed pattern.


The gating system regulates the speed and flow of the metal as it enters the mold and it is intended to reduce liquid turbulence, which can erode the mold and result in a failed casting. I used a small gate for the casting to solidify slowly.


Bondo body filler is typically used to fix dents in cars, but it also has applications in sand casting. I used limited amounts of bondo filler to fix imperfections and fill in gaps on my pattern. Once the bondo was fully set, I sanded off any excess material to achieve optimal geometric precision.


Post Machining The Sand Casted Part
I post-machined the part to ensure that the top and bottom sides of the leg were perfectly straight. I then proceeded to create threaded holes that connect the cast piece to the base and the top of the table respectively. The holes are strategically positioned to not be visible to the end user.


To achieve maximal geometric precision, I had to file away some of the impurities that resulted from the casting process. I then used sanding paper to(up to a 300 grade) to prepare the surface for a sand blasted finish.


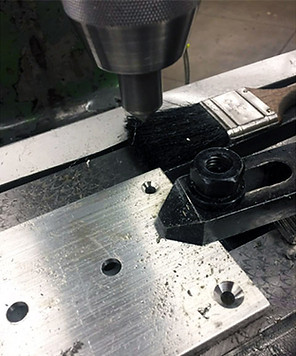
Milling
The base of the table is made from a (10inch x 10inch) piece of aluminum. The two smaller plates serve as connecting elements. The holes are countersunk to ensure the screws sit flush with the surface of the surrounding material.


Woodworking
The table top is a (15inch x 15inch) square. I used the jointer/ planer to produce a flat surface along the length of the wood plaques to achieve the same thickness for all pieces. Then, I glued the pieces together, following the wood texture/ patterns to make the connections appear seamless. Once the glue was fully cured, I cut the excess material using a table saw at a 45 degree angle and rounded off the edges on the power sander. Finally, I added threaded inserts to connect the table top to the leg.


