COCOON
COCOON
An exercise on traditional manufacturing processes
MAGNIGYING GLASS
An exercise on traditional manufacturing processes
MAGNIGYING GLASS
Tinkerer, Engineer, Designer

I built this mold at the Stanford Product Realization Lab as an exercise to synthesize my knowledge of 3D printing materials, design for additive manufacturing and CAD/simulation to create a physical product.
The Challenge
Design a fixture or tool using principles of design for additive manufacturing. Print/finish it and showcase its functionality by using it to manufacture parts in the context for which it was designed.
Instructor
Dan Somen


THE DESIGN PROCESS
I decided to create a jewelry piece out of silicone to further explore its material properties and because of its great compatibility with the plastics used in 3D printing. It is easy and safe to use, and serves as a great introduction to casting small, intricate objects, without the added complexity of casting metals, such as silver. In the future, I would like to use the knowledge acquired from this project to develop more complex geometries and cast silver parts.
1. Ideation
I drew inspiration from my favorite jewelry designers and developed a series of design schemes by hand before transitioning to CAD. Specifically, I focused on interlocking mechanisms and repeatable patterns to take advantage of making multiples using the mold.


Linkages in chain formation
Alternative chain formation
Interlocking triangles
2. Understanding Silicone - Can We Interlock Flexible Parts?
I made three silicone cast parts to test the interlocking triangles mechanism. In an ideal scenario, the triangles would be stiff (yet flexible) enough to interlock with each other and create an earring chain or bracelet assembly. While the first two parts locked together nicely, adding a third triangle made the assembly too heavy. The opening deformed significantly, as it was too flexible to withstand the weight of the other parts. To solve the stiffness issue, I came up with an acrylic insert mechanism that can be used to make the interlocking mechanism more robust.

Interlocking 2 triangles (barely holds)
Interlocking 3 triangles (too much weight)
3. Final Design
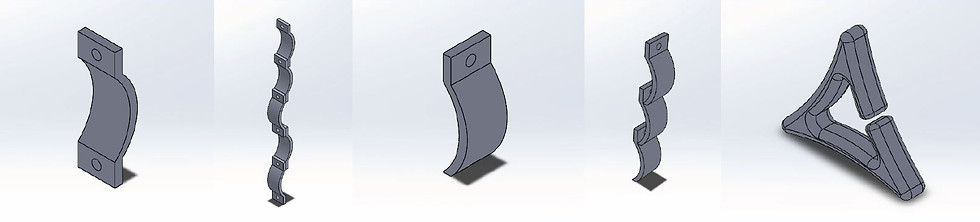
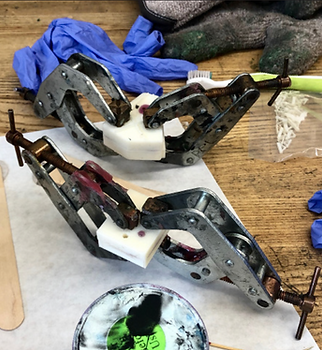
I decided to test my acrylic insert mechanism by developing a simple earring in the shape of a triangle. I printed the part using the Stratasys Dimension machine because of its low cost, high print speed, and good surface finish quality. Additionally, the Dimension prints in ABS, which is strong enough to withstand the clamping forces without deforming. The air vents are designed to prevent the creation of air pockets at the triangle tips.
Male part of the mold
1
2
3
Female part of the mold
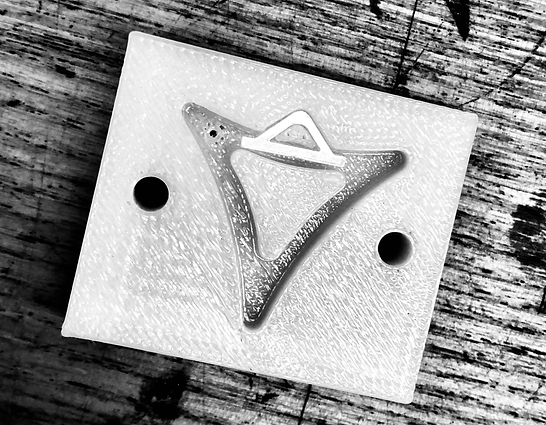
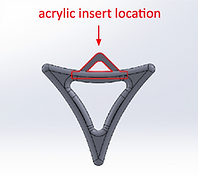
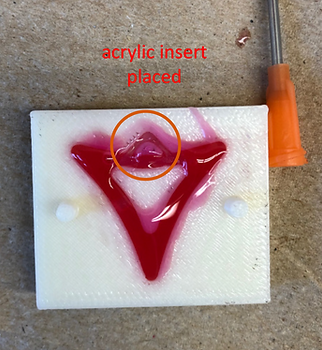
Acrylic insert
The acrylic insert is used to make the part stronger and stiffer at the location the earring is hanged from.
4
Stress analysis
for an 85 N clamping force to optimize part thickness.
5
Displacement analysis
for an 85 N clamping force to minimize warping.


2
3


4
5
1
THE SILICONE CASTING PROCESS


Preparing the silicone mix
Removing air bubbles
Pouring silicone into the mold


Clamp for curing (24hrs)
The cured part
Acrylic embedded successfully
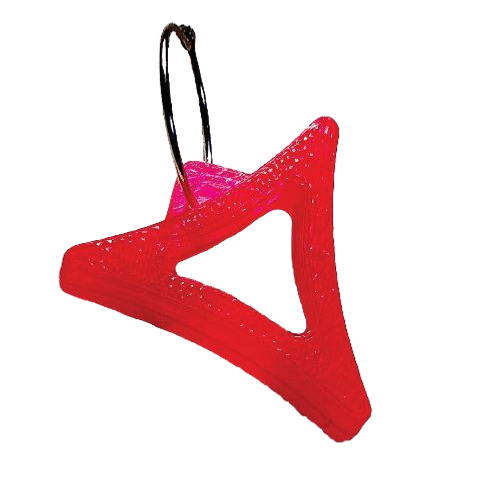
THE FINAL PRODUCT